Quick-Start
The Quick-Start guide explains how to, in few steps, get from an API to a functional Python plugin. Steps 1 and 3 are universal for other technologies. In the step 2 you will choose a concrete Python template. For more general information about first steps with ApiGear First Steps
The quick start enables only basic features: the api(TBD) generation and simple stub(TBD) implementation. For all available features check the overview.
1. Install the Code Generator
ApiGear provides two powerful tools: a Studio and a Command Line Interface (CLI). The Studio is a graphical tool for creating, editing API modules and projects, while the CLI is a command-line tool for generating code from API modules. Both offer comprehensive functionality, including SDK template management, API project creation, code generation, API monitoring, and API simulation.
Install ApiGear Studio
ApiGear Studio is available for macOS, Windows, and Linux. You can download it from the ApiGear Studio GitHub releases page.
For more detailed information on ApiGear Studio, refer to the dedicated studio documentation.
Install ApiGear CLI
The ApiGear CLI is a versatile command-line tool for generating code from API modules. It's available for macOS, Windows, and Linux. Download the latest version from the ApiGear CLI GitHub releases page.
The CLI offers all the features available in the Studio.
For more detailed information on the ApiGear CLI, consult the dedicated CLI documentation.
2. Obtain the Template
There are several methods to obtain the template: installation via the Studio, installation via the CLI, or cloning/downloading from GitHub.
The ApiGear Studio and the CLI detect the specified template in the solution document and install it automatically.
Optional steps (click to expand)
Installation via CLI
When using the CLI, only the highlighted line needs to be executed. You can verify the successful installation using the template cache command.
- Unreal Engine
- C++14
- Qt6
- Python
$ apigear template install apigear-io/template-unreal@v3.2.2
$ apigear template cache
list of templates from the local cache

source                            | url                                               | installed | latest
apigear-io/template-unreal@v3.2.2 | https://github.com/apigear-io/template-unreal.git | <sha1>    | v3.2.2
...
$ apigear template install apigear-io/template-cpp14@v3.6.0
$ apigear template cache
list of templates from the local cache

source                            | url                                               | installed | latest
apigear-io/template-cpp14@v3.6.0  | https://github.com/apigear-io/template-cpp14.git  | <sha1>    | v3.6.0
...
$ apigear template install apigear-io/template-qtcpp@v0.4.0
$ apigear template cache
list of templates from the local cache

source                            | url                                               | installed | latest
apigear-io/template-qtcpp@v0.4.0  | https://github.com/apigear-io/template-qtcpp.git  | <sha1>    | v0.4.0
...
$ apigear template install apigear-io/template-python@v1.0.0
$ apigear template cache
list of templates from the local cache

source                            | url                                               | installed | latest
apigear-io/template-python@v1.0.0 | https://github.com/apigear-io/template-python.git | <sha1>    | v1.0.0
...
Installation via Studio
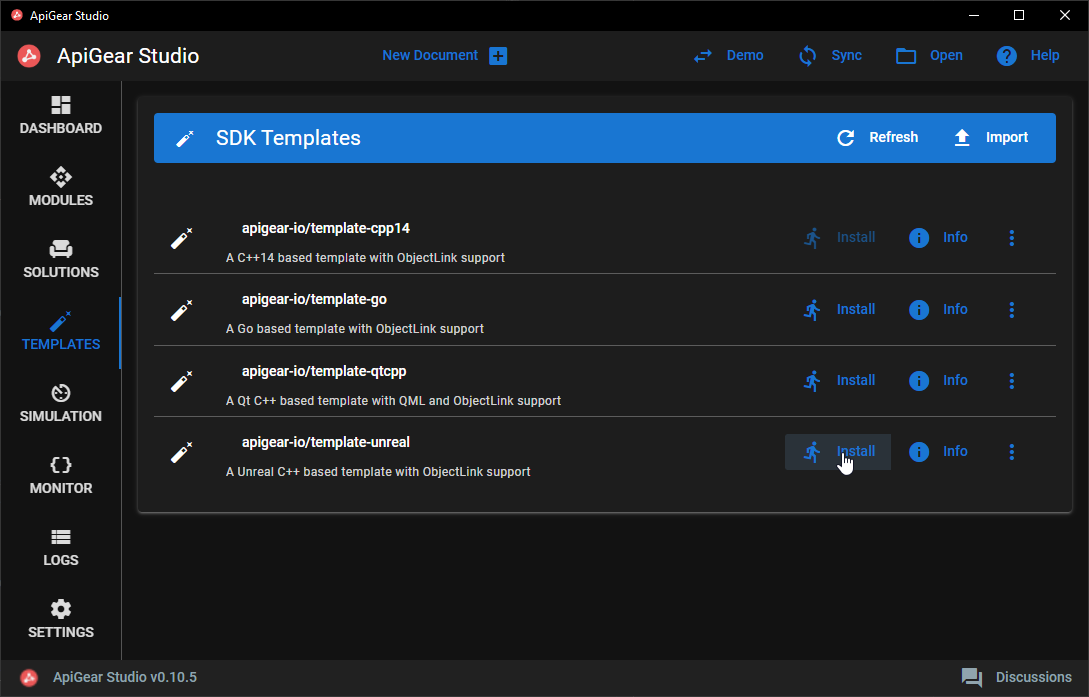
Installing the template through the Studio is straightforward:
- Unreal Engine
- C++14
- Qt6
- Python
- Open an existing project or create a new one
- Navigate to the
Templatestab - Click
Installon theapigear-io/template-unrealentry
- Open an existing project or create a new one
- Navigate to the
Templatestab - Click
Installon theapigear-io/template-cpp14entry
- Open an existing project or create a new one
- Navigate to the
Templatestab - Click
Installon theapigear-io/template-qtcppentry
- Open an existing project or create a new one
- Navigate to the
Templatestab - Click
Installon theapigear-io/template-pythonentry

Cloning from GitHub
If you need to inspect or modify the template's source code, cloning or downloading the repository is recommended. The repository doesn't need to be part of your project and can be stored anywhere on your computer.
- Unreal Engine
- C++14
- Qt6
- Python
$ git clone https://github.com/apigear-io/template-unreal.git
$ git clone https://github.com/apigear-io/template-cpp14.git
$ git clone https://github.com/apigear-io/template-qtcpp.git
$ git clone https://github.com/apigear-io/template-python.git
You can then configure the solution file to use your template by providing the relative path from the solution file to the template directory.
3. Set Up the Project
A typical project requires two files: a solution file specifying the APIs and the template to use, and at least one API module file. Ideally, both should be placed in a folder named apigear, adjacent to each other.
Alternatively, you can use the Studio to create a new project and modify the two example files provided.
Solution File
Create a solution file. The example below specifies:
- Module files in line 8, here the
helloworld.module.yamlmodule with theHelloAPI - The output directory for generated files in line 9
- The template used to generate the code in line 10 (this can also be a path to a local copy of the template)
- The enabled features of the template in line 13, here the
stubsfeature, which provides a simple implementation of interfaces.
- Unreal Engine
- C++14
- Qt6
- Python
schema: "apigear.solution/1.0"
name: hello_world_example
version: "0.1.0"

targets:
  - name: ue_docs
    inputs:
      - helloworld.module.yaml
    output: ../ue_docs
    template: apigear-io/template-unreal@v3.2.2
    force: true
    features:
      - stubs
schema: "apigear.solution/1.0"
name: hello_world_example
version: "0.1.0"

targets:
  - name: cpp_hello_world
    inputs:
      - helloworld.module.yaml
    output: ../cpp_hello_world
    template: apigear-io/template-cpp14@v3.6.0
    force: true
    features:
      - stubs
schema: "apigear.solution/1.0"
name: hello_world_example
version: "0.1.0"

targets:
  - name: qt_hello_world
    inputs:
      - helloworld.module.yaml
    output: ../qt_hello_world
    template: apigear-io/template-qtcpp@v0.4.0
    force: true
    features:
      - stubs
schema: "apigear.solution/1.0"
name: hello_world_example
version: "0.1.0"

targets:
  - name: hello_world
    inputs:
      - helloworld.module.yaml
    output: ../py_hello_world
    template: apigear-io/template-python@v1.0.0
    force: true
    features:
      - stubs
You can extend this solution file with additional targets, each for a different technology with a different template. The module.yaml file is technology-independent and can be used with any template.
We highly recommend specifying the exact version of the template. Otherwise, a newer version will be automatically downloaded and used for code generation. This can lead to unexpected behavior if file structures or code changes in the template.
Set the force parameter to true if you want to always override all generated files. When set to false, some files, such as implementations (stub feature), won't be updated. API files are always updated regardless of this setting.
API Module File
Use your preferred text editor to create the helloworld.module.yaml file with the following example content:
schema: apigear.module/1.0
name: io.world
version: "1.0.0"

interfaces:
  - name: Hello
    properties:
      - { name: last, type: Message }
    operations:
      - name: say
        params:
          - { name: msg, type: Message }
          - { name: when, type: When }
        return:
          type: int
    signals:
      - name: justSaid
        params:
          - { name: msg, type: Message }
enums:
  - name: When
    members:
      - { name: Now, value: 0 }
      - { name: Soon, value: 1 }
      - { name: Never, value: 2 }
structs:
  - name: Message
    fields:
      - { name: content, type: string }
4. Generate Code
Generate via CLI
The following snippet demonstrates how to run the CLI and provides an example output:
$ apigear generate solution apigear/helloworld.solution.yaml
10:52:20 INF generated 21 files in 30ms. (20 write, 0 skip, 1 copy) topic=gen
- The
generatecommand instructs the CLI to generate code - The
solutionparameter specifies that we want to process a solution file
Generate via Studio
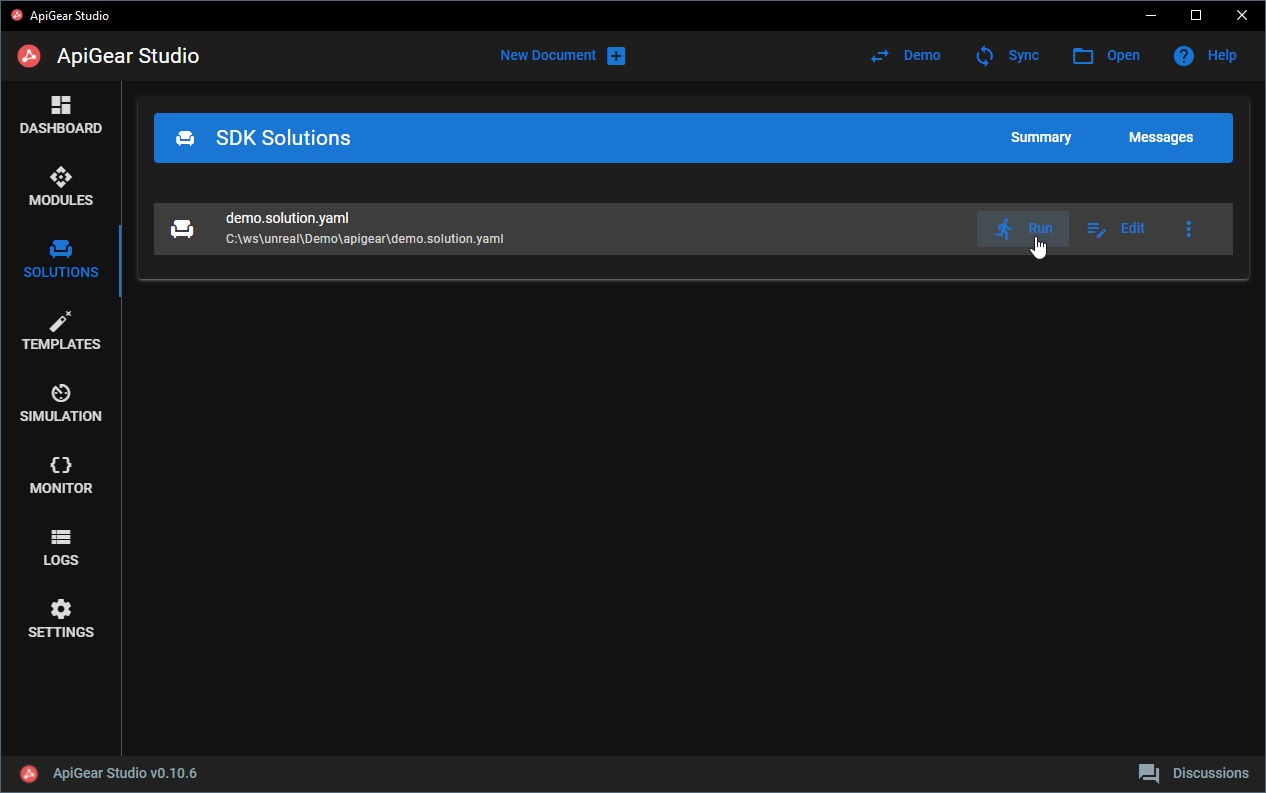
- Open the project
- Navigate to the
Solutionstab - Click
Runon thehelloworld.solution.yamlentry

5. Use the generated Python project
Project folder structure
With the output directory set as in example, both ApiGear files reside in an apigear subfolder next to the generated files.
In this case the folder structure should look similar to this
📂hello-world
 ┣ 📂apigear
 ┃ ┣ 📜helloworld.solution.yaml
 ┃ ┗ 📜helloworld.module.yaml
 ┣ 📂py_hello_world
 ┃ ┣ 📂io_world
 ┃ ┃ ┣ 📂api
 ┃ ┃ ┗ 📂implementation
 ┃ ┗ 📜CMakeLists.txt
Using the solution file from the previous paragraph the code will be generated in the py_hello_world folder.
With subfolder for each module, here io_world as the name of module (defined in line 2 of helloworld.module.yaml).
It contains both features generated: a basic api and a stub implementation.
Make sure you have Python in at least 3.11 version and pip package installer for python.
The generated code provides Python implementations. The following paragraphs show how you can use it.
Start with installing all the requirements in requirements.txt file in top level directory with command
pip install --upgrade -r requirements.txt
It is recommended to install the dependencies in a virtual environment(venv).
The 'api.py' contains all definitions of the enums and structs for your module, as well as the abstract base classes for your Interfaces. From now on you can simply import the api or the stub implementation modules and use it. For more details on generated features please check api(TBD), stubs (TBD).
Check the extended features to see how to use your API over the network.
For the simulation check the olink feature(TBD) which provides middle layer on your code side and the simulation explained.
Create and run an example
Prepare an examples folder in the hello-world/py_hello_world directory with a main. like this:
import asyncio
import os
import sys

#add context - path to modules
sys.path.insert(0, os.path.abspath(os.path.join(os.path.dirname(__file__), '../')))

import io_world.api
import io_world.impl

def main():
    myHelloInstance = io_world.impl.Hello()

    # Try out properties: subscribe for changes
    def handle_last_changed(message):
         print("last property changed ")
         print(message)
    myHelloInstance.on_last_changed += handle_last_changed

    # and ask for change.
    messageForProperty = io_world.api.Message()
    messageForProperty.content = "New message";
    myHelloInstance.set_last(messageForProperty);

    # Check the signals with subscribing for its change
    def handle_just_said(message):
         print("justSaid signal emitted ")
         print(message)
    myHelloInstance.on_just_said += handle_just_said

    # and emit one.
    messageForSignal = io_world.api.Message()
    messageForSignal.content = "Message from signal";
    myHelloInstance._just_said(messageForSignal);

    # Play around executing operations, maybe they emit signals? or change the properties?
    method_result = myHelloInstance.say(io_world.api.Message(), io_world.api.When.NOW);
    print("Method result")
    print(method_result)
    myHelloInstance.on_last_changed -= handle_last_changed
    myHelloInstance.on_just_said -= handle_just_said

if __name__ == '__main__':
    main()

}
You can run it e.g from console. Open a terminal, navigate to generated code (py_hello_world) and run the example with command python examples/example.py.